In this article I’ll give you my method in order to solve the AurumQ-1 puzzle, a “bandaged ” 3x3x3.
For details, take a look at this page: http://www.twistypuzzles.com/cgi-bin/puzzle.cgi?pkey=2337
I made mine with cubetwist’s bandaging kit, so it doesn’t shapeshift, but apart from it, it does every moves an original would do and has the same “bandaging”.
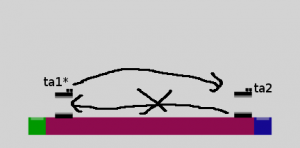
Below you can find a scheme of the aurumQ-1 if you’d like to make your own one (you don’t need the kit to do it, only a simple 3x3x3 with a bit of tape is enough)
My solution is very simple and requires only 2 algorithms and a bit of intuition.
I splitted this method in 2 main parts:
-
Corners pairing and placement
-
Edges placement
step 1: corners
So, as I just wrote, the first step will be to pair corners 2 by 2 (by pair I mean placing one corner next to it’s neighboor).
The 3 first pairs are purely intuitive, if you’ve already solved a 3x3x3 you shouldn’t have much troubles doing it.
The first problem may come at your fourth and last pair. Effectively, most of the time you’ll get the 2 last corners swapped. (if it is not the cast, you’re very lucky and can go to the next step)
The problem is that you can’t use algorithms like some PLLs of the CFOP method for standard 3x3x3s because your bandaged cube won’t allow some of the movements required.
So the solution has been to find another algorithm that does this action using only the allowed moves. I finally came to a solution, but I imagine it isn’t the most efficient algorithm to perform this task, if someone has better, feel free to share it in the comments.
In order to reverse them, I do the following algorithm (using the standard 3x3x3 notation) with my “middle-moving” slice on the left of my front face:
L2 U L2 U’ L2 D L2 U’ L2 U’ L2 U L2 U L2 U’ D’
After performing that, your last 2 corners should be nicely paired.
Maybe you’ll have seen at this step that we won’t have to look at the orientation of the corners, which makes the resolution even smaller.
You’re half done!
The next and last step will be to place your edges correctly!
step 2: edges
In order to place my edges, I’ve had again to create a new algorithm, the ones I knew couldn’t be applied due (again) to the bandaging.
The algorithm I made is not the best because it does 2 2 corners commutation, but it is enough to solve entirely the puzzle (this method doesn’t aim to speedsolve)
Assuming you’re in the same position as for the algorithm I wrote before, here are the edges that will be swapped:
- {(front;up),(back;up)}
- {(top;right),(bottom;left)}
Here is the algorithm:
L2 U (L2 U2)2 L2 U’ L2 U2 L2 U2
Try to think a bit and your puzzle will be solved within a few algorithms.
You’re now done, congratz 😛
This was very funny to figure out how to solve it. Obviously this isn’t a very efficient method but it is enough to feel proud of it!


